Pages

Showing posts with label imperial guard. Show all posts

Fully Army Shots- The Imperial Guard

As soon as this post goes live, I am off to Chicago for Adepticon!!  Everything is packed and ready to go. Before the great journey goes, I'll leave you with some eye candy. The Black Jacks Company of Cadia's finest is ready for action this weekend.
If you are interested in what is going on at Adepticon or want to stop by and say hello, I'll be using Twitter. Feel free to leave me a message.


Look Ma! All done!

The Imperial Guard are all done, and ready for the Adepticon 40K tournaments this weekend. Its going to be an awesome time!!


Think I made the board big enough!  Plenty of room on there for another 1,000 points of models, that is for sure. The craters will be getting some more 'water' effects and color over night. Other than that, its all done and ready to travel to Chicago. 

Imperial Guard: Full Army Picture

Here you go folks, finally a full army picture posed on a the mock-up display board. This is my 1850 point army ready for the main tournament at Adepticon this year. It will also get a chance to participate in the incredible team tournament on Saturday.


Expect plenty of more pictures of this army and the display board this week. I hope to have everything done long before I pack up the car to head to Chicago.

Imperial Guard General

Its nearly done fellow bloggers. The Imperial Guard are done, except a few small details here and there. One of the last miniatures to get completed is the general. While I have a couple of command models from the standard GW line, this is perhaps my favorite. It was in the goodie-bag at Adepticon 2010.  Multiple Golden Demon winner Chris Borer sculpted the model and its fantastic. I just felt bad not including it in this year's Adepticon tournament.


Melta-Vets

Adepticon is closing in on us all, and my Imperial Guard army is nearly complete.
One of the last bits of the puzzle was to add a bunch more melta-gun carrying loyalist guardsmen. As I shared earlier, I didn't want 8 more of the standard melta pose. So Games Workshop was kind enough to send me a melta-gun bitz back and after a few hours of work, these guys are nearly done. The only thing left is a touch up here and there on the bases and the squad markings on the shoulder pads.


And with that, the arm is nearly complete. Just the army general to finish! After that, finish up the display base and that will wrap up the Imperial Guard army for this year's Adepticon. 
Friday's 1850pt Warhammer 40K tournament should be a great time. I don't expect to do that well in the tournament, however my experience with Adepticon last year showed that if you come with an open attitude, you'll have a blast playing against some spectacular armies and their owners. 
I leave for the suburbs of Chicago in one week!  Yikes!!

IG: Psyker Battle Squad

They are done, finally. They have been sitting on my painting table for some time now, but I think they are officially done!
Thanks to the recommendations from the page and twitter- I did add some purple washes to the skin (ever so slight) and I think it helps a bit.
Overall I like the unit on the table and what I have done with them. Though using the fantasy models is a bit of stretch its the best I've come up with since GW doesn't have a good selection for an entire unit. Hopefully I there will be some viable miniatures in the future (perhaps from the resin sculpting community!).


Also you can see my custom resin models in a bit more detail. You can see the imperfections of my first casts in these models well. However, on the table top these aren't as well seen as when magnified on the computer screen. My second version resin bases were much better, just not for this army! 


WiP: Psychic Battle Squad

Work is quickly coming along on the last of the Imperial Guard army. I need it ready in time for Adepticon, which is only 31 days away! This is the most glorious time of the year- winter is on its way out and gamers everywhere are gearing up for the greatest of tabletop gaming conventions. I just get all tingly inside just thinking about it.

Work is nearly done on the PBS, a mash up between Empire Flagellants and Cadian models. I still have to finish the flesh and the bases. My intent was to make the skin very pale to reflect the psychic nature of these guys. However, with the tan clothes there just isn't enough contrast to make the skin pop out.
However, I do like the bits from Armorcast to represent the 'psychic' miasma.

Chimera's in Triplicate

This past weekend, the family went out of town leaving me some time to really get the Imperial Guard finished (or nearly finished!). However, an upper respiratory infection also took over the weekend. :(
But, having strong faith the Emperor (and sudaphed, caffeine, a huge back log of 40K podcasts),  I was able to finish three Chimeras complete with weathering techniques.


One hobby tip. I tried a new type of spray primer, which I DO NOT RECOMMEND. Its the Montana Gold line of colored spray paints. It was highly recommended by folks in the art community. However, its mostly used for outside work on rough textures (i.e. graffiti). On fine scale modeling it left a rough prime coat. Reading up on the internet, its what everyone complains of. However, I left the rough coat in place since it gave the Chimeras some more texture. However, if you want a colored spray primer, Army Painter is still your best bet for a smooth colored primer.


The Leman Russ turent is reclaimed LR kit from a friend that I quickly did to add to the rest of my army. The weathering techniques work very well on yellow, even better than on the green.

Valkyrie "Metallica"- Nearly Done

When I last left you all, we had applied the oil based paints for the first step of the weathering effects. I let that dry over night and then applied weathering pigments. Using the Earth and Mud set from SWM, I went to town. In the past, I would have applied a spray matte coat before using the pigments. However, this time I hoped that oil paint would help the pigments to stick better, and I was right. There much less pigment "blowing" off the model this time around. You have to be a bit careful with the pigment in the oil paint since the pigment will absorb a small amount, changing the color.


There are still a few detail pieces left to do as well as magnetize the wings for various Forge World Weapon options. The base also needs some work, and that will happen this week.

WiP: Valkrie "Metallica" Part Two

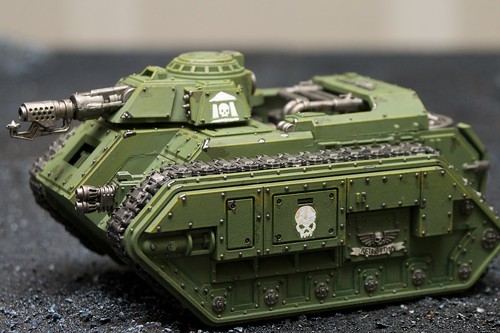
Last night I left the 'plain' looking Valk to dry with its decals in place and then quickly gave the model a spray with a matte sealer. Now its time to weather the crap out of this thing. All of the rest of the vehicles in the army reflect the cruel 'Martian' like sands and wind on the outer moon of Cadian where the Black Jacks train and protect the Imperium from the vile influence of Chaos. To reflect this, we need to weather this poor bird like a mother.

I am using Oil Based paints to 'tint' the model. Its a common technique in the military modelers and it works great with 40K models for sure. All you need is a few tubes of paint.  With the primary colors and a few browns you can make anything you want. One tube will last a modeler several lifetimes. Also, wait until Hobby Lobby puts these on sale (a couple of times a year) to get them even cheaper. Also, you can use water based paints. But then you don't get to sniff paint thinner. It would be your loss.


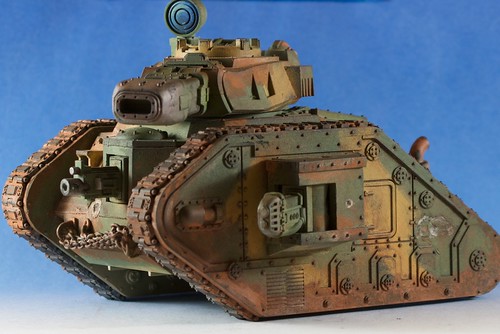
The first step is to ruin your model. Take some dabs of the paint and place it on your perfectly based plane. Don't worry, just have fun. I tried to put my 'lighter' colors in areas of highlight and the darker browns in areas of shade. 


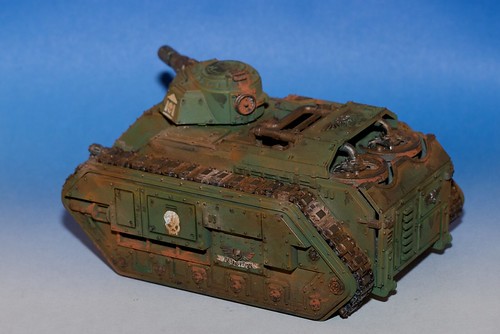
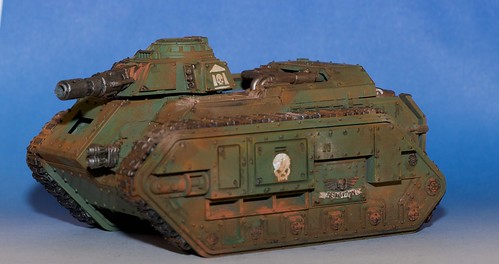
Then, dip your brush in paint thinner and start to move the oil paint around. You'll find you instantly create a wash-like material that not only goes into the deep parts of the model but 'tints' the entire model.  In the case of the Valkyrie, I made sure that the brush strokes all went in the same direction to represent oil, engine grease, and atmospheric dust moving along the hull when this beast flies through the air. If you find that you have too much paint left in an area, just dilute your brush with more thinner. Play around, its fun. But don't sniff too much of the thinner. 


Here it is, nice wet oily mess. I'll leave her overnight to dry. Remember that the oil paints take a minimum 24 hours to dry, and often much longer than that. That means you still have time to move the paint around, and if you add more water/thinner to model you'll loose what you have done. So matte seal it before you do anything else. 
More tomorrow. 

WiP: Valkyrie, the "Metallica"

Painting 30 Imperial Guardsmen is proving to be a bit daunting, so I changed gears to get my Valkyrie ready to play. It will join his two Vendetta brothers and has been named, Metallica.
Painting the large IG vehicles is a bit different than how I am painting the foot soldiers, and I wanted to document the experience with all of you.

First I primed the Valk with Army Painter Army Green and then went over the model with GWF Gnarlac Green with a tank brush. There are only a few places on the plane that are colored different- Boltgun Metal on the 'metal' parts, Blood Red on the coupling hoses on the fuselage, and white 'kill' markings on the side of the nose. Long ago I decided to cover up the canopy- so it got black and metal paint as well.


Lastly, I placed painters (low tack) tape on the wings and using GWF Iyanden Darksun to paint the stripes on the wings.


Once all was dry decals were added where you see them. Make sure you follow this process when using decals (or learn to cry softly to yourself). Using paint-on gloss varnish to the area where the decals will sit and let it dry.  Then using water slide the decal onto the model in the usual fashion. Then using Microscale's Micro-Set, paint over the decal. When dried, use Microscale's Micro-Sol.  At this point, I stopped to let everything sit overnight. One further word on the decals. When using decals on Space Marine shoulder pads I then painted on and around the decal to get rid of the 'shine' and 'halo' seen with this process. However, in this model we'll deal with it another way. Once dry, the model needs a coat of Matte Spray. That is where we will start tomorrow.


The Imperial Guard March

Since the completion of the Blood Angels project, I've dove right back into the Imperial Guard. They need to be finished and in fighting shape in time for Adepticon this year. While I expect to see lots of other IG armies, particularly with mech-heavy armies I hope to be able to stand out in some way. How is that?  Not so sure at the moment! :)

Actually, I plan to use a 'bubble wrap squad' to protect my heavy tanks. This is a common tactic of surrounding your tanks with infantry to give them a line of protection from scouts, infiltrators, and other charging what-nots. The IG get the advantage of having a Commissar that confers Stubborn to the unit, of 30 strong warriors.

So here is the start of all of those models, using the "Army Painter" method. I did an Adeptus Administratum Tutorial awhile back, here.


The guys have gotten their base coat, the shading and are ready for the decals, matte seal, and some touch up work. I've learned over time that the skin needs to be done separately but other than that, the models are nearly done.

WIP: Psychic Battle Squad

One of the coolest units in the new Imperial Guard codex is the Psychic Battle Squad. The variable AP template is cool and all, but Weaken Resolve is where the money is. A near automatic Ld reduction coupled with the shooting power of the Imperial Guard can threaten any unit in the game that doesn't have fearless. I say nearly, because as my last few games have showed me- I can't roll a psychic power test for crap! Still, I love the PBS (the station and the squad).


Since there are no official models for the PBS we are left to conversions and luckily for us there are lots of options. One of the most popular are generic guardsmen with Empire Flagellant bits. Its a simple, yet elegant solution. At Adepticon this year I talked with several people who used  Armorcast scenic effect bits to add some flare to their conversions. 


I plan to paint the scenic effects an ectoplasmic green or blue to represent them firing Weaken Resolve. Their uniforms/robes will be muted browns or grays in attempt to give them a more unnatural feel. These are the first ten. My full army plan is to have two full units... 

Manticore

The new Manticore/Deathstrike kit from GW is another of the very nice kits for the Imperial Guard line. However, I have one complaint. You can only make one missile from the kit. There is no way you can magnetize the missiles, ugh. But other than that, the Manticore kit is very slick.


The front 'radio' dish needs to be completed, but the rest of the model is done. The only other thing I need to do is to find some scatter dice that actually role 'hit' so that my missiles are more accurate!

Completed: Chimeras

The Cadian Guard regiment of the Black Jacks now have two new dust covered chimeras to ride around the battlefield. The first is of course the older chimera set and the second is the newer. Of course the older version comes with a great add-on kit that adds character to the transport. The new one is ok. Of course the tracks are much easier to assemble, but thats it.


One thing you my notice is that the right turret decal started to flake off. Strangely it did it on both tanks. At the moment, I am going to leave it there and let it fall off once it gets some game time. Then we can also go back and re-weather that section of the turret.

Again I heavily weathered these transports- and loved the heck out of it. First was oil washing techniques I've talked about before and then weathering pigments from Secret Weapon. This time I managed to seal the tank without blowing all the pigments off!


On the painting table is still a Manticor and a Psychic Battle Squad- full of conversions. 

The 721st Black Jacks


I guess it was only a matter of time before it hit me that the regiment number to the Cadian Black Jack's would be a combination of the target number 21 and lucky 7. So obvious. 

I have started a new project while the Black Jacks get put on hold for a bit- my first commission project. A friend of mine (henceforth named the client) asked me to paint up his new Blood Angles. Loving the new plastics, I said sure!  It was a bit of a surprise when 20 Sanguinary Guard landed in my painting room. The good news is that I had plenty of Shining Gold on hand! Pictures coming in soon. 

The Black Jacks

Its taken some time, but I finally have a name for my Cadian Imperial Guard- The Black Jacks.  The name is taken from their use of 'spades' and 'diamonds' on their armor. I suppose that some units also carry the 'hearts' and 'clubs' as well. But those would be regular infantry, saving the 'spades' and 'diamonds' for the veteran troops.


The Black Jacks incorporate both black and red into their armor, breaking the typical Cadian green and khaki coloring. I hope to also tie in the red belts into the bases when they are completed. 

The army is coming close to completion- still 2 chimeras, one manticore, some more vet troops, and the psyker battle squad. 

Rogue Trader: RPG

Before leaving for GenCon, I had one last member of the Rogue Trader crew to complete: Arch-Militant Dekko. This former Imperial Guardsmen is heavily trained in the art of close combat, particularly with twin chainswords!
He ended up being a great character on the table, and the gentleman who played him really got into the spirit of charging forward and letting flesh fly!  However, he had the worst luck I've ever seen during a four-hour game. No matter then number of re-rolls, he couldn't kill a thing!!  Everyone else in the party got at least one kill shot, except the man trained since birth to kill!  It was awesome... everyone at the table had a great laugh every time Dekko rolled the dice.
The head was a simple swap with some plastic kelt models that appeared in my swag bag from Adepticon.


I don't know how or if he will ever see the 40K table as an Imperial Guardsmen. Perhaps a stand-in for one of the named characters in a friendly game.

Hell Hound Varient

I am out on vacation this week, but I wanted to drop some pictures into the blog. I added some weathering on my Hell Hound Variant before leaving for Lake Michigan (sometimes its good to be the Doc!).

This is my standard Cadian scheme. Nothing fancy, just clean colors and some decals.


Now, the weathering: I used my weathering pigments and thinned them with paint thinner. As I mentioned before this gives you the ability to add the pigments without fear of them rubbing off (or flying off with the propellant from the sealers hits it). It also turns the process into more of a glazing medium than a 'dusting' medium when you use the pigments plain. Its all about preference I guess. 

IMG_7918

IMG_7917


Leman Russ: Executioner

I bet you all thought that I died!  Nope, those rumors are greatly exaggerated. However, I have been dealing with a bit of 'real' life, what ever that is. In the meantime I have finished off my Leman Russ Executioner. Its been a real PIA to finish, let me tell you.


I changed the paint scheme in the middle of the project because I didn't like the tone of the colors in the original tank (see my last post for more details). Once that was done, the initial sealant stage hit a snag with "frosting" with the sealer. While I'd like to blame my sealer- the real blame should probably go to me- I didn't shake enough (in hind sight) and the humidity was near 100% that day here in the mid-west.

Its a good thing that further work with the oil paints was already planned!


In the end, I used many of the same techniques from the other tanks, plus a few from the Forge World Book. One of the things that didn't work so well was the weathering powders.  One can use them straight out of the box with no fixative. Or one can mix it with paint thinner. This allows it to work closer to a standard paint, and you don't have to be nearly as careful with it as you would with the pigment.  However, I found that the translucency that came so easily with the dry pigment was lost with the thinned pigment. You could regain that with multiple layers of very thin pigment, but that defeated the point of using dry pigments in my opinion. This is not a tank for a painting competition.


I have a couple of more tanks for the Imperial Guard to paint. Those will be coming soon!