.
For May I stuck with Imperial Guard and chose a Heavy Slot- the Lemon Russ Demolisher! I also tried some new weathering techniques which I'll talk about below. Stage One: Prime with Army Builder: Army Green and touch up with a watered down Foundation Knarlock Green. I found these two colors match almost directly, with the Knarlock Green being a touch lighter shade.
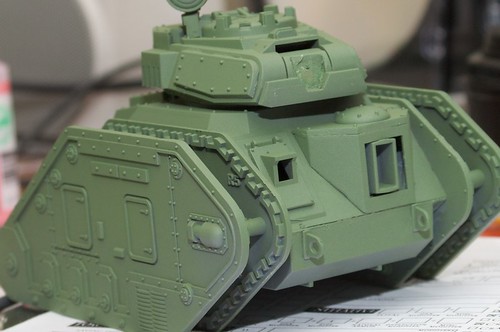
Stage Two: Highlight the edges with Camo Green; Boltgun Metal to the metal bits; Apply the Decals with MicroSet and MicroSol (must haves when using decals). Over the decals I touched up the letters with Skull White and tried to mute the decal effect with more Knarlock Green. I'm not to worried right now because we are only half way done... you won't see the sheen on the decals soon (I hope!).
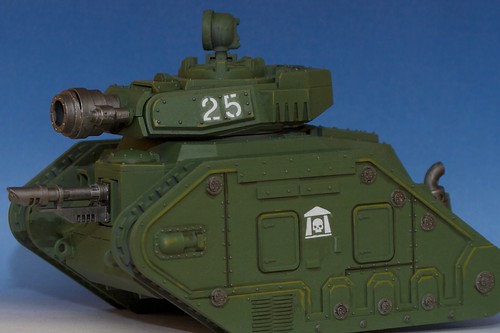
Stage 3: Now its time to weather the model. For my Imperial Guard, I choose a method that basically puts a 'filter' over the model using oil based paints, using a oil based pain for rust effects, then finally using a weathering powder at the end. You can read more about my decisions here.
Lets get started. First off I took some Oil Based paints and painted thin vertical stripes of brown, blue, and yellow. Don't freak out on me, it'll change in one second!
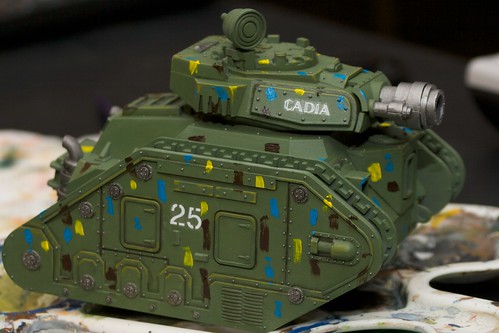
Stage 3B: take some paint thinner in your brush and 'thin' the paint in downward vertical strokes. The thinner will desolve the oil paint, leaving you with a filter over the tank. You can play around with where you put the paint, and how much in order to make the tank's weathering seem less uniform.
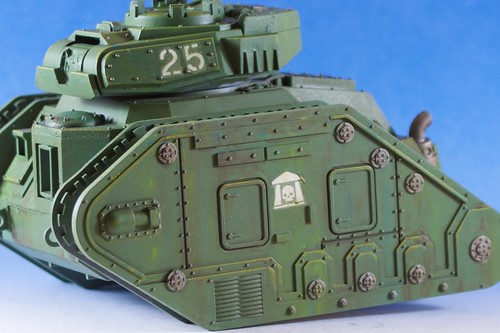
Stage 4/5: After you paint the oil based paints, you have to seal them. On a regular canvas painting, it may take at least 24 hours for the paint to dry. However, on our plastic models, it will never fully dry and will rub off even with careful handling. So you must seal the model. After that, I did the same technique with Winton Oil Color #340 Raw Sienna. Now this curious color has 'Natural Iron Oxide' as its pigment. That's rust people! After sealing the bottled rust to the model, I placed the tracks (primed black) on the tank. I also added some paint peeling effects with Chaos Black on several edges of the tank in a random blotting motion, then filled in the middle with Boltgun Metal. Be sure to leave a bit of black around the silver. Remember to seal again after added the rust oil paint.
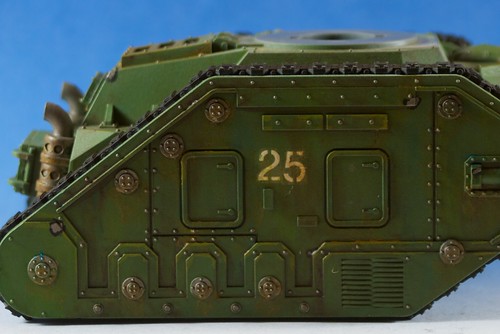
Final Stage: Even here, I am happy with the model. However more dirt, mud, and age needs to be added. I used the weathering pigments from Secretweaponminiatures and used there tutorial as well. You can read it here. Grabbing an old drybrush I dove into the project. Dark Earth first, then Terracotta Earth, then finally Clay Brown. Add your pigments in a random fashion and don't be afraid of really going to town. If you don't like what you have, you can always wipe it off! Lastly, I used the Metallic Iron on the edges of the tracks. Then it happened... I didn't use the sealant just right. You MUST stay at least 12" away from the model when sealing weathering pigments. If you get to close, you will 'soak' the pigments and they will get dark loosing a lot of color, and you will blast them off the model. Almost all of my pigments were gone! So second time with the pigments- this time I rubbed some of the pigment in more than the first time. And then when it came time to apply the sealant coat- I always stayed arms length away.
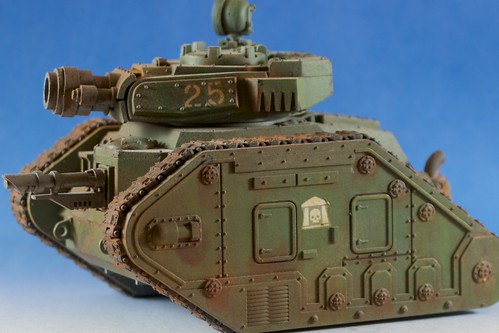
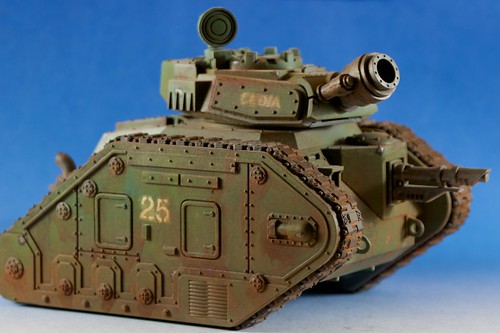
There you go- easy weathering that gives a great e effect with minimal effort, even if it takes a few days to complete because of the drying time of the thinner and sealants. This was my first time with the weathering pigments, next time I have a few ideas to make them stand out better!