Pages

Showing posts with label painting. Show all posts

How To Deal With an Orc Horde (As a Painter)


The Orc Horde is upon us!


Ranking models for Warhammer Fantasy is a much different task than arranging individual models for Warhammer 40K. You have to keep models, in rows of five or ten around four rows deep, lined up in a (near) perfect square. This is great when dealing with models like goblins, elfs, and humans. When it comes to orcs, the process sucks. Big Time. These Goblins have it easy.

40K orks are allowed to be more free-form but in WFB the bulky arms and legs are nearly impossible to keep square without making the models all face the same direction. When Jason and I first started talking about the army, it was clear we both liked the 'chaos' of having spears, swords, and shields sticking out in all directions. Its a far cry from the old days of WFB where metal models all faced the same diagonal direction. Those were dark days of modeling!


The easiest way to make these models form up, is to cheat. By making use of the long bases and and the square bases from Citadel you can break up the boring squares and add some depth to some of the filler models. You can take advantage of being able to squeeze four models closer together than on four individual bases leaving room to rank up all the models around the larger bases. Here I used the 50mm Monster Bases to squeeze these orcs together to protect them from the incoming arrow fire.
"Watch 'ur 'eads mates!"
"Oi, not in me eye!"

With the Savage Orc Boys I need to pull a different trick out the box. Jason wanted to have the ability to run one forty orcs unit or two twenty orc strong units, each with banners and musicians. The problem was that I was only given forty models.  So naturally two, models were taken out as extra musician and banner which allowed me to put one model in a spot for two in the main rank.(Here I used two 25mm x 50mm bases). Because of the chaos from the unit, you don't even miss those two orcs. That is the true nature of orcs I guess. 
Its only kinda cheating. 

So the full squad contains 38 models with two extra stand-ins!

And they get to play king of the hill.
The last thing I wanted to do but just wasn't able to make it work with the orcs is to make a formidable shield wall, like the Greek Hoplites. It was outside of my ability and didn't fit the aggressive nature of the orcs. I compromised.  So the front rank here was pushed far forward to make room for the second rank of models. I also positioned orcs taking the ranged shooting while getting ready for the initial hand to hand combat.
Perhaps another army can hide behind large shields. I'm looking at you Men-At-Arms!
Lastly, I used a number and letter system with stick on labels pasted to the bottom of each model. That way units can be assembled quickly and easily. 


It Is Finished


Long time followers of this blog know that I have been working on an Orcs and Goblin Army for PappaJJ for greater than one year at this point. I am proudly announcing today, that it is finished! It features over 2K points worth of core units, two 40-orc strong units, and plenty of characters. I'll be posting the army over the next several posts and going into detail about each unit and the heroes. Don't worry, I'll be back to painting 40K armies soon enough. I have lots of Inquisitor models to share.

PappaJJ has been very gracious in making sure I had plenty of time to work on other projects while working on his army. However, I'll make it said that since Adepticon finished this year, I've work hard-core on finishing this army. Now its time for some hard earned time off, mainly to clean up my hobby and painting area!


One of the cool things about this army is that PappaJJ wanted an unusual paint scheme- no red, no yellow, no black. In fact he wanted winter colors and something that worked well with his Dark Elves. So purple and orange finally emerged as the key colors to balance out the green skin of the orcs.  It was a fun army to pain, but using this colors proved to be a fun challenge. It was great fun working with snow effects to try to create some freshly fallen snow. 

What I Learned at Adepticon

Adpeticon has come and gone, and I've (finally) recovered from the Con. Before moving on to GenCon and the other summer cons (as well as getting back to painting) I wanted to share my thoughts about what has become the best miniature wargaming con in the land.

Adepticon is still the premier wargaming con, bar none (you've heard that already).  Don't believe the blogs and what not- the tournaments are only a small part of the experience. Though most of the events are tournament related, most of the players are just here for the experience, meet up with old friends, and games in a well organized area. Its still a Gentlemen's Gaming Con.

Just an 'average' hobbyist army! No, this was seriously cool DE army display board.

Special Operations: Kill Zone was a blast. You can read more about that here.


Giving away a Battlefoam Bag is a recipe to get 1,000 gamers to line up hours before registration begins. I was especially thankful for getting a VIG badge. I'll put that on the list for next year as well! On that note, the Adepticon swag bag has already been a thing of legend. Please keep it that way. Well worth the trip, just to get the bag. This year's special miniatures were nothing short of awesome.

The only camera I used was my iPhone 4GS. No DSL-R for me this year. And the pictures I got were just a great as any with my big camera. As an added plus, the iPhone was with me everywhere and I wasn't constantly looking after my big camera making sure it didn't sprout legs and wonder off.


No need to carry that big camera around anymore fellas!

Registration for an event is purely optional. Despite most events (at least 40K related) being sold out months ago, there were a lot of no-shows for nearly every event. Its certainly possible to show up early and get in an already full event. Trust me. I did it for several events!


In a sense, this event has become "Lobby Con" for me. Two nights we sat in the Lobby drinking beer and eating (usually pizza) just hanging out, seeing old friends, making new friends, and just talking to other hobbyist. Just hanging out seems to be a very reasonable way to spend a lot of time at Adepticon.

Unidentified friend enjoying Lobby Con... very

The Team Tournament still remains the highlight of the weekend. The amount of awesome armies and awesome people will never be forgotten. Three of our games were spectacular. And while one game fell flat, the team captain sought me out the next day to apologize and promised a better game next year if were to ever play. So sign me up, we'll be back again for the Team Tournament.

Big Display armies for the Team Tournament. This from our friends at the Axis of Ignorance.
Our Team- Hot Wings sporting dual Raven Wing armies. Complete with custom templates we gave out to our opponents.

Justin of Secret Weapon Miniatures is a stud teacher. It was my only hobby class this year, but was well worth getting out of bed on Sunday for. You'll be seeing plenty of weathering effects in the coming months. Everyone should do at least one hobby event every year. You will grow as a hobbyist, promise!

Mr. Justin.

My Death Wing terminators and my 'old' rust effect.


It would be cool to see more "small" vendors in the back halls. Battle Ready Figs and Techtonic (laser cut MDF) had booths set up. But I could envision small vendors with unique hobby supplies or supplements with a very low cost, fan friendly set up. The main vendor hall was nice (as always) but I am interested in seeing what the small guy has up his sleeve.

One of about 1,000 Psy-Bolt Dreadnoughts.
I just love the Chaos fliers. Come on GW and give us some flyer love this summer!!

I was shocked to see the 'lack' of hobbyist involvement with Warmachine. No doubt there were lots of players present, but the amount of cool looking armies was low. In fact, there were many unpainted models. In contrast Warhammer Fantasy and Flames of War had as many players, with many fantastic looking armies. Malifaux remained small, but had a dedicated following. The new Dust Tactics/Warfare game was constantly drawing people's attention. It will be interesting to see what happens to the game in the next year or so. Mantic had their new space dwarves and space 'rats' (i.e. skaven) on display. Expect to see even more 'counts-as' armies next year!


I expect to be painting some of these soon. I've been wanting to do Space Skaven for nearly a decade now.

Plague Marines: Tutorial

.

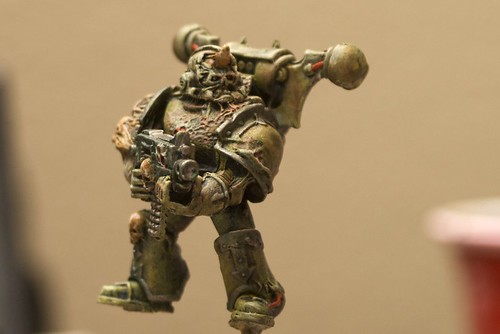
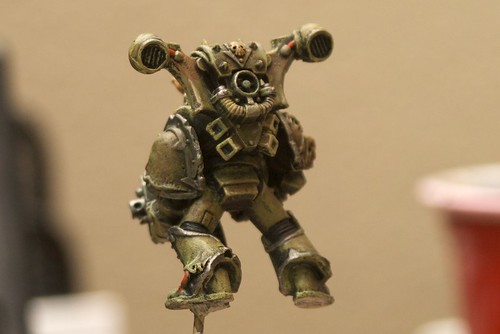
I just posted a tutorial on the Bolter and Chainsword forums on painting a Death Guard model using primarily washes. Check it out here.

I'll skip the boring middle parts and go straight to the finished product. You can thank me later!


IMG_7555

IMG_7554

Painting this model was more fun that I thought it would be. Its going to be hard to concentrate on finishing those weak fleshed Imperial Guard so that I can start on some real models, like the Plague Marines!

WiP: Imperial Guard Valkyrie

.

After finishing the Hell Hound, my attention turned to the Valkyrie. This was the model that turned my attention to the Imperial Guard in the first place. And, if you have read my Adepticon posts or have been to a large tournament in the last year you know that a lot of other people have started the IG for similar reasons. And for good reason, its a super sweet looking kit and the rules are awesome. Winner, winner, chicken dinner (as my grandmother would say!).

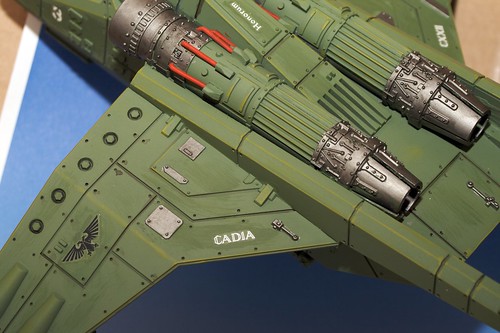
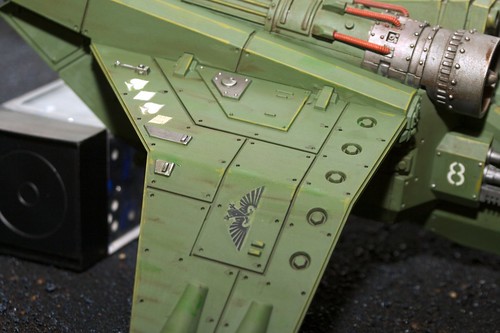
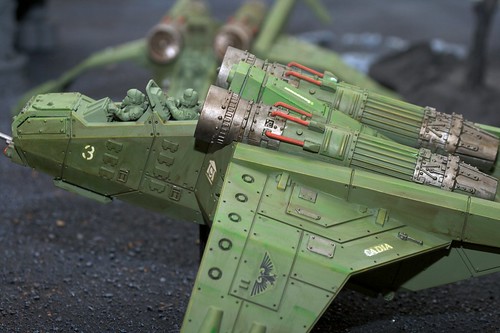
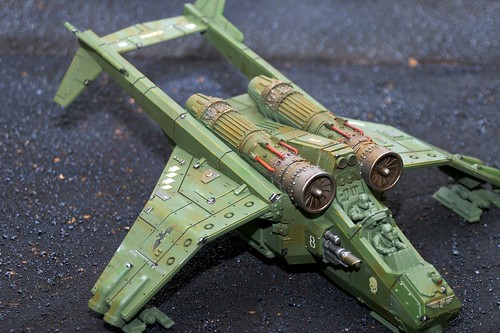
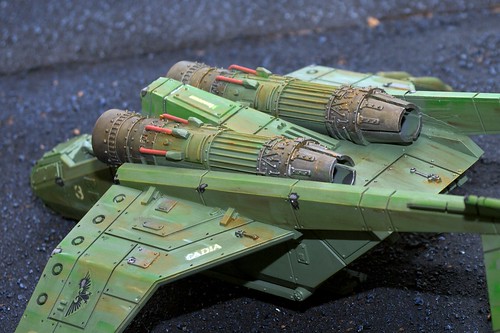
Now for such a serious model, I wanted to try to some new stuff and generally end up with a nice looking model without spending forever on it. Enter in weathering. I grabbed my ideas from a number of blogs (mr justin, Mathieu Fontaine, and Ultrawerke). Traditionally, the GW hobbiest weathers with GW paints and possibly some of the weathering powders on the market. However, these blogs pointed to the historical hobbiest use of oil based paints to achieve the same results. With this you gain a couple of advantages over a traditional wash- its quicker, it retains a high surface tension so the oil 'wash' doesn't dive down deep into the shadows, and over the long term it is much cheaper.

First off- I painted the model like normal. Then I added some highlights with hard lining and placed some decals to celebrate Cadia.


IMG_7501

Oh, I did two at a time.

IMG_7504

After a dose of Purity Seal the first oil wash was started. The local Hobby Lobby came through in a major way. I got several colors of Winsor & Newton Winton Oil Colours. They run about $6 per tube, and a tube will last you for several years, possibly longer. If you keep a close eye out, HL will offer special sales on their oil paints. I bought black, white, burnt umber, and the primary colors (red, blue, and yellow). With these colors you can make any other color out there using white and black to adjust the saturation. I got burnt umber just because that is a color I'll use a ton of.

Next apply these colors in random areas with short strokes moving along the sides of the plane in a lateral motion. Then thin this down with a paint thinner. Using the thinner to get the opacity you want, and travel the brush in the direction you want your weathering. Have fun with this step!

Warning- oil based paints take several DAYS to dry. I did one or two colors at a time, then applied another dose of Purity Seal to the models, then repeated the process.

IMG_7506

IMG_7510

At this point some of the areas were done messily- no worries, there are more steps to come.

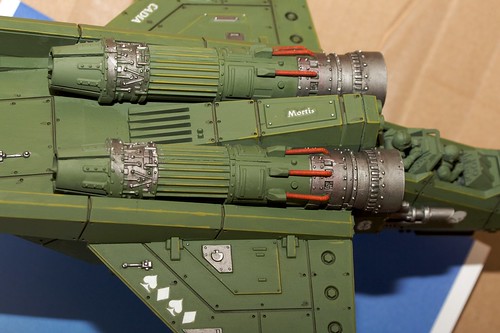
My last step, at this time was to add Raw Sienna (same paint line as above) since the main ingredient is 'rust'. Thusly, this was my rust stage of the weathering, done in the same fashion as above.

IMG_7519

IMG_7520

IMG_7523


Obviously still WiP at this point. However, the main body is done. The flash on the camera picked up the lighter green oil paints more than you see in with the normal eye. Once those illusive Forge World Vendetta parts come in, I'll be able to convert over the Valks to the Vendetta.

Blood Splatters...

.


Today at work (I am a general practice doctor) I was doing a procedure and had a tourniquet on a lady's toe to control any blood. At the end of the procedure, I figured all of the blood was clotted and snapped the tourniquet off. Yeah, so I forgot that she was on a blood thinner and blood went flying across the room. Its a good thing that I was wearing a bright white shirt that now sported a nice thin splatter of blood across it.

Now the sick part comes in. While cleaning my shirt I started to look at each drop from a miniature prospective. How does it land... does it drip.. what color is it... is it matte or varnish... yeah sick stuff. :)
Just a note, if you get blood on your white (or any color) shirt, Hydrogen Peroxide if applied quickly will get the blood out of the shirt amazing well.

Here is a miniature I did awhile back- take note of the blood stains. Its not bright red. Blood especially in small amounts dries brownish-red. Its matte. And it usually hits you in a spray like manner, not a huge clot- especially if it came from an artery or from a punch in the face from a space marine.

Too many times I see blood represented as a big red bloob. That only happens when you make huge cuts and leave large amounts of blood together to clot (or congeal).

Anywhere, here is the Malifaux figure Dr. Douglas McMourning:

IMG_6804

Today's lesson taught me that I need some smaller blood splatters on the apron. If I wanted 'more' blood- a big smear would probably work. But I get the feeling that this is old dry blood on his apron. I love this figure...


.